How to Compare Multiple Memory Snapshots
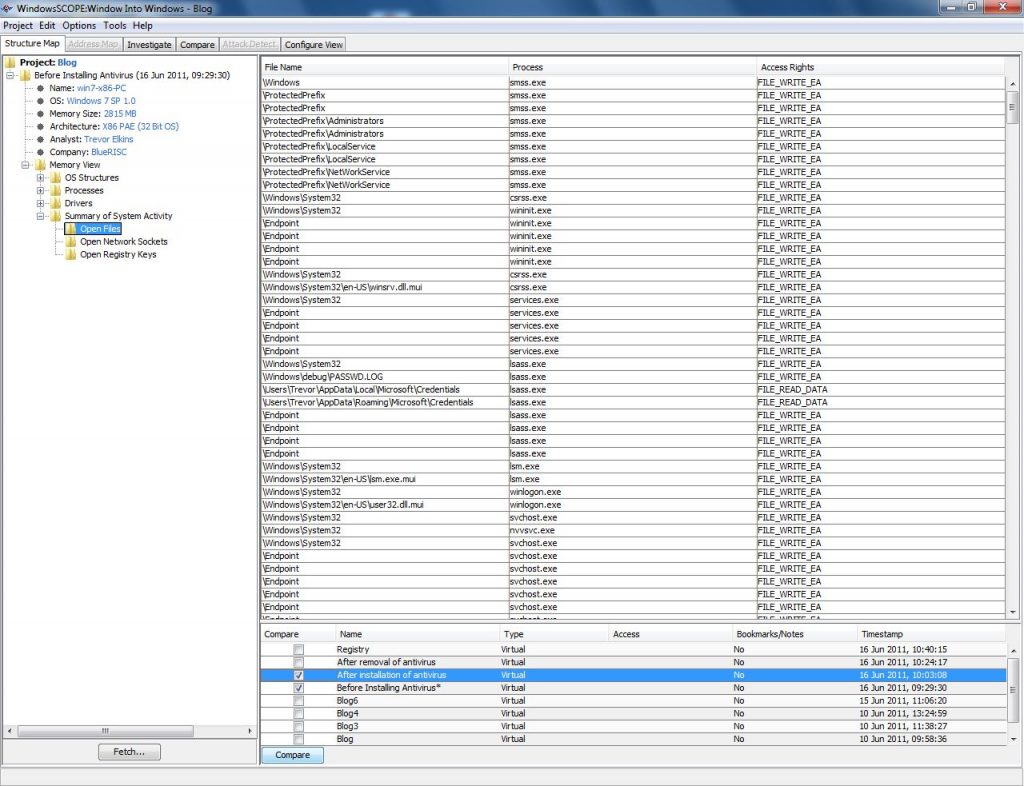
How to Compare Multiple Memory Snapshots https://www.windowsscope.com/wp-content/uploads/2016/07/cblog1-1024x786.jpg 1024 786 WindowsSCOPE WindowsSCOPE https://www.windowsscope.com/wp-content/uploads/2016/07/cblog1-1024x786.jpgIn this screen shot, the example snapshot ‘Before Installing Antivirus’ is selected. The view is on Memory View → Summary of System Activity → Open Files, which is showing the Open Files for just the current snapshot. To compare this list to a list from another snapshot, check the box for the snapshots that are to be compared in the bottom panel and click ‘Compare’. Only two snapshots can be compared at a time.
After clicking ‘Compare’, a prompt will come up asking for the ‘Start Row Number’ and ‘Comparison Length’ for each snapshot. This tells the Compare Tool where to start comparing in the list and for how long. By default, it starts comparing at the first entry and continues all the way to the end of the table. Once the desired settings are chosen, click ‘Compare’.
Now the two lists are compared side-by-side. The earlier snapshot is shown to the right and the newer to the left. If something is highlighted in red, then it is found in the newer snapshot and not the older. For entries highlighted in green, then it is found in the older snapshot and not the newer. Lastly, if an entry is highlighted in blue, then the entry is found in both, but has been modified in some way. White is the default color for entries that have been untouched.
In the above example, after installing the AVG anti-virus several new files belonging to the AVG directory are found to be open (highlighted in red). For ease of use, each snapshot panel can be maximized to the full WindowsSCOPE window by pressing the ‘Maximize’ button directly above each scroll bar. The newly opened files that WindowsSCOPE detected appear to be related to AVG’s real-time protection. WindowsSCOPE could similarly be used to inspect suspicious software.


